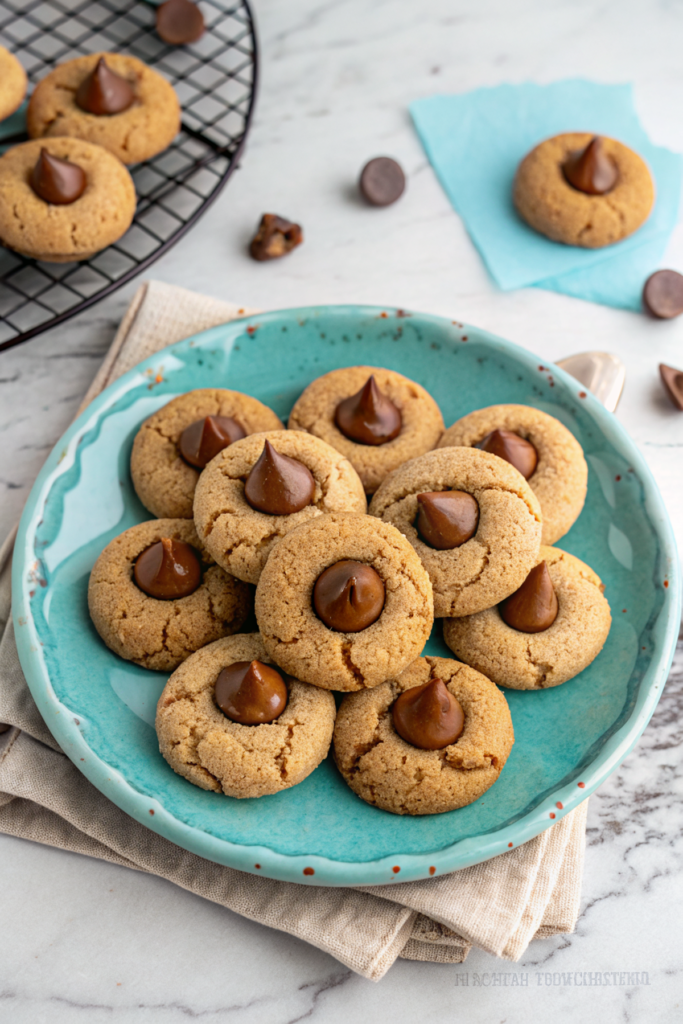
Classic Peanut Butter Blossoms are soft and chewy peanut butter cookies with a sugary, crackled top and finished with a milk chocolate kiss! They’re the perfect go-to cookie for the holiday season—a timeless favorite that’s been gracing Christmas cookie platters since 1957. There’s something magical about that combination of rich peanut butter, sweet cookie dough rolled in sparkly sugar, and that iconic Hershey’s Kiss pressed right into the warm center. These cookies aren’t just delicious—they’re nostalgic, bringing back memories of baking with grandmothers, holiday parties, and cookie exchanges. The recipe creates perfectly tender cookies with those signature crackled edges that make them so visually appealing. Whether you’re continuing a beloved family tradition or making them for the first time, these Peanut Butter Blossoms deliver consistent, crowd-pleasing results every single batch. Get ready to fill your kitchen with the irresistible aroma of peanut butter cookies and create some sweet holiday memories!
Prep Time: 20 min | Cook Time: 10 min | Chilling Time: 1 hr | Total Time: 1 hr 30 min
Key Ingredients
For the Cookie Dough:
- 1¾ cups all-purpose flour
- 1 teaspoon baking soda
- ½ teaspoon salt
- ½ cup creamy peanut butter
- ½ cup unsalted butter, room temperature
- ½ cup granulated sugar
- ½ cup light brown sugar, lightly packed
- 1 large egg
- 2 tablespoons milk
- 1 teaspoon vanilla extract
For Coating and Topping:
- ½ cup granulated sugar (additional amount for rolling)
- 11 oz bag of Hershey’s Kisses (milk chocolate)
Substitution Notes: Natural peanut butter doesn’t work as well as conventional creamy peanut butter—stick with brands like Jif or Skippy for best results. You can use salted butter and omit the added salt. Dark chocolate Kisses or Hugs (with white and milk chocolate stripes) work beautifully for variety.
Step-by-Step Instructions
1. Mix Dry Ingredients In a medium bowl, whisk together the all-purpose flour, baking soda, and salt until evenly combined. Set this mixture aside while you prepare the wet ingredients.
2. Cream Butter, Peanut Butter, and Sugars Using a hand mixer or stand mixer fitted with a paddle attachment, cream together the creamy peanut butter, unsalted butter, granulated sugar, and light brown sugar on medium-high speed. Beat for 2 to 3 minutes until the mixture is well blended, light, and fluffy. The sugars should be mostly dissolved and the mixture should look smooth.
3. Add Wet Ingredients Add the egg, milk, and vanilla extract to the peanut butter mixture. Beat until fully incorporated, scraping down the sides of the bowl as needed to ensure everything is evenly mixed. The mixture should look smooth and creamy.
4. Combine Wet and Dry Reduce the mixer speed to low. Gradually add the dry flour mixture to the wet ingredients, mixing just until completely blended and no streaks of flour remain. Don’t overmix—stop as soon as the dough comes together. The dough will be soft and slightly sticky.
5. Chill the Dough Transfer the cookie dough to a well-sealed food storage container, or tightly wrap the top of the mixing bowl with plastic wrap. Chill the dough in the refrigerator for a minimum of 1 hour. This step is essential for easier handling and helps the cookies maintain their shape during baking. You can chill the dough for up to 24 hours if making ahead.
6. Prepare for Baking After the dough has chilled, line 2 baking sheets with parchment paper or silicone baking mats. Adjust the oven rack to the second level mark (just above center) for optimal heat distribution. Preheat the oven to 375°F (190°C). Place the ½ cup of granulated sugar for coating in a small bowl. Unwrap your Hershey’s Kisses now and place them in a bowl so they’re ready to press into the hot cookies—this makes the process much smoother!
7. Shape and Coat Using a spoon or small cookie scoop and your clean hands, shape the chilled cookie dough into 1-inch balls (about 1 tablespoon of dough each). Roll each ball thoroughly in the granulated sugar until completely coated. Place the sugar-coated dough balls about 1½ to 2 inches apart on the prepared baking sheets—they’ll spread during baking.
8. Initial Bake Bake the cookies for 7 to 8 minutes. The cookies should be slightly puffed and the edges should be just starting to set, but the centers will still look very soft and underdone. This is exactly what you want!
9. Add the Kiss Remove the baking sheet from the oven and immediately place one milk chocolate Kiss in the center of each cookie, pressing down gently. The Kiss will create those beautiful crackled edges around it—that’s the signature look of Peanut Butter Blossoms! Work quickly while the cookies are hot so the Kisses adhere properly.
10. Final Bake Return the baking sheet to the oven and bake for 2 minutes longer. This second bake sets the cookies while slightly melting the bottom of each Kiss so it sticks perfectly.
11. Cool Properly Remove from the oven and let the cookies cool on the baking sheet for 5 to 10 minutes. They’ll be very delicate when hot, so this cooling time allows them to firm up enough to transfer. Then move them to a wire cooling rack to cool completely. The chocolate Kiss will set as the cookies cool.
Serving Suggestions
- Holiday Cookie Platter: Arrange alongside other Christmas classics like sugar cookies, gingerbread, and chocolate crinkles for a beautiful variety
- Cookie Exchange Star: These are perfect for cookie swaps—they’re universally loved and travel well when properly packaged
- Milk Pairing: Serve with cold milk for the classic after-school or anytime treat that kids and adults both adore
- Gift Boxes: Package in festive tins or clear bags with ribbon for homemade gifts that everyone appreciates
- Dessert Display: Arrange in rows on a platter or stack in a pyramid for an eye-catching presentation
Storage & Make-Ahead Tips
Room Temperature Storage: Store cooled cookies in an airtight container at room temperature for up to 1 week. The secret to keeping them soft? Place a slice of bread cut in half in the container with the cookies. The cookies will absorb moisture from the bread, staying wonderfully soft for much longer. Replace the bread slice every few days. Trust me, though—these cookies won’t last a week!
Freezing Baked Cookies: Freeze fully cooled cookies in a single layer on a baking sheet until solid (about 1 hour), then transfer to freezer-safe containers or bags with parchment paper between layers. Freeze for up to 3 months. Thaw at room temperature for 30 minutes before serving. The chocolate may develop slight bloom (whitish appearance) but will still taste delicious.
Freezing Cookie Dough: Roll the dough into 1-inch balls but do not coat them in sugar yet. Place on a parchment-lined baking sheet and freeze until hard (about 1 to 2 hours). Transfer frozen dough balls to a freezer storage bag and freeze for up to 3 months. When ready to bake, coat the frozen dough balls in sugar and bake for 9 to 11 minutes. Do not let them come to room temperature before baking—bake directly from frozen. Top with the chocolate Kiss after the first bake, then return to the oven for 2 minutes more.
Make-Ahead Instructions: The dough can be made and chilled up to 2 days in advance. You can also shape the dough balls, place them on a baking sheet, cover with plastic wrap, and refrigerate for up to 24 hours before baking. Baked cookies can be made 3 to 4 days ahead and stored properly.
Pro Tip: These cookies actually taste better the next day after the flavors have had time to meld, so they’re perfect for advance baking!
Tips & Tricks
Unwrap Kisses in Advance: Before you start baking, unwrap all your Hershey’s Kisses and place them in a bowl. This allows you to work quickly when adding them to the hot cookies. Trying to unwrap them while cookies are cooling on the sheet creates unnecessary stress and mess!
Don’t Skip the Chill Time: Chilling the dough for at least 1 hour is essential. It makes the dough easier to handle, prevents excessive spreading during baking, and helps create those signature crackled edges when you press in the Kiss.
Work Quickly with the Kisses: You need to press the Kisses into the cookies while they’re still very hot from the initial bake. If the cookies cool too much, the Kisses won’t stick properly and the crackled edges won’t form as dramatically. Have your Kisses ready and work efficiently!
Common Mistakes to Avoid
- Using natural peanut butter – The oil separation in natural peanut butter creates greasy, flat cookies; stick with conventional creamy peanut butter
- Overbaking – These cookies should look slightly underdone after the first 7-8 minutes; they continue cooking during the second bake
- Not chilling the dough – Unchilled dough spreads too much and creates thin, crispy cookies instead of thick, chewy ones
- Waiting too long to add Kisses – Press the Kisses in immediately after the first bake while cookies are piping hot for best adhesion
- Storing while warm – Let cookies cool completely before storing or the chocolate will smear and cookies will become soggy
Chef’s Advice
Flavor Variations:
- Use crunchy peanut butter for added texture and peanut pieces throughout
- Try different Kiss flavors: dark chocolate, caramel-filled, cherry cordial, or even peppermint for holiday twist
- Add ½ teaspoon of cinnamon to the dry ingredients for warmth
- Mix in ½ cup of mini chocolate chips to the dough for extra chocolate
- Use Reese’s Peanut Butter Cup Miniatures instead of Kisses for a different take
Ingredient Substitutions:
- Almond butter or cashew butter can replace peanut butter for nut allergy alternatives (though the flavor will differ)
- Dairy-free butter works for a dairy-free version
- Dark brown sugar instead of light brown sugar creates deeper molasses flavor
- Coconut sugar can replace granulated sugar for a less processed option
Presentation Ideas:
- Arrange cookies in concentric circles on a round platter for elegant display
- Use different colored Kisses (red, green, pink) for holiday or themed parties
- Place in clear mason jars tied with ribbon for gift-giving
- Create a cookie advent calendar with individually wrapped Peanut Butter Blossoms
- Stack in a pyramid on a cake stand for dramatic dessert table centerpiece
Perfect Kiss Placement: Press the Kiss in at a slight angle rather than straight down for more interesting visual appeal and more pronounced crackled edges. Make sure it’s centered for that classic look.
History and Cultural Significance
Peanut Butter Blossoms have a fascinating origin story that’s deeply rooted in American baking history. The recipe was created in 1957 by Mrs. Freda F. Smith from Ohio for the 9th Annual Pillsbury Bake-Off Contest. While it didn’t win the grand prize, it captured America’s heart and became one of the most enduring recipes to come out of the competition.
The Pillsbury Bake-Off, which began in 1949, was instrumental in shaping American home baking culture. It encouraged home cooks to experiment with recipes and share their creations. Mrs. Smith’s Peanut Butter Blossoms perfectly embodied the spirit of 1950s baking—simple, accessible ingredients combined in creative ways to create something special.
The partnership with Hershey’s Kisses was genius marketing and culinary pairing. Hershey’s Kisses themselves have been produced since 1907, becoming an iconic American chocolate. The combination of peanut butter (an American staple) with mass-produced chocolate (affordable luxury) created a cookie that was both economical and impressive.
The recipe became especially popular during the holiday season, appearing in countless Christmas cookie collections throughout the 1960s and beyond. Its visual appeal—that distinctive chocolate Kiss pressed into a sugar-sparkled, crackled cookie—made it perfect for cookie exchanges and gift-giving.
Today, Peanut Butter Blossoms are considered a quintessential American cookie and a must-have on holiday cookie trays. The recipe has been passed down through generations, adapted and tweaked by countless home bakers, yet the essence remains the same. It represents mid-century American baking at its finest—approachable, festive, and absolutely delicious.
Final Thoughts
These Classic Peanut Butter Blossoms are more than just cookies—they’re a piece of American baking history and countless cherished memories rolled into one delicious treat. Whether this is your first time making them or you’ve been baking them for decades, there’s something special about that moment when you press those Hershey’s Kisses into the warm cookies and watch those beautiful crackled edges form.
The recipe is wonderfully reliable and forgiving, making it perfect for bakers of all skill levels. Kids love helping to roll the dough balls in sugar and pressing in the Kisses, making these ideal for family baking sessions. The combination of peanut butter and chocolate is timeless and universally beloved, guaranteeing these cookies will disappear quickly wherever you serve them.
So gather your ingredients, preheat that oven, and get ready to create a batch of nostalgia and deliciousness. These Peanut Butter Blossoms are about to become a treasured tradition in your kitchen, just as they have been for millions of families since 1957. Happy baking!
Nutrition Information
| Serving Size | Calories | Protein | Carbs | Fat | Fiber | Sugar |
|---|---|---|---|---|---|---|
| 1 cookie | 107 | 2g | 14g | 5g | 0.4g | 10g |
Additional Nutrition Details: Saturated Fat 3g | Polyunsaturated Fat 0.4g | Monounsaturated Fat 1g | Trans Fat 0.1g | Cholesterol 10mg | Sodium 66mg | Potassium 26mg | Vitamin A 65 IU | Calcium 18mg | Iron 0.4mg
Disclaimer: Nutrition information is estimated using standard online calculation tools and may vary based on ingredients and preparation methods. For accurate dietary advice, consult a qualified nutrition professional.
Course: Cookies, Dessert | Cuisine: American | Author: Jennifer | Yield: 48 cookies | Servings: 48
Recipe adapted from the Original 1957 Bake-off Contest Recipe and Grammy’s family recipe.